Heating is the biggest part of most UK energy bills. For a typical home, more than half of the gas and electricity used in a year goes on keeping rooms warm and heating water. So it makes sense to ask a simple question first: is the heat staying in the house, or is it leaking out through the roof, the walls and the floor?
Insulation is the answer to that question. It is the material that slows heat escaping from your home, so your boiler works less, your rooms stay warm for longer, and your bills come down. It is not glamorous, and you cannot see it once it is fitted, but it is the single most useful upgrade most UK homes can make. The Energy Saving Trust puts it plainly: insulate first, and upgrade your heating second.
This guide explains how to insulate your house step by step, in plain English. You will learn where heat escapes, how to work out what your home needs, what loft, cavity wall, solid wall and floor insulation involve, how to draught-proof doors and windows, how to lag pipes and your hot water cylinder, what each job costs, how much it can really save, which order to do the work in, which grants can pay for it, and how to avoid damp and ventilation problems. All prices are typical UK prices from late 2026, and they are a guide only. Prices vary by house size, region and installer, so always get written quotes for your own home.
What Does It Mean to Insulate Your House?
To insulate your house means to add material that slows heat passing through the parts of your home that touch the cold outside: the roof, the walls, the floor, and the gaps around doors and windows. The material traps tiny pockets of still air, and still air is a poor conductor of heat. That is all insulation does, and it does it well.
Think of it like a coat. A coat does not make heat. It stops the heat your body makes from escaping into the cold air. Insulation does the same for your home. Your boiler makes the heat, and the insulation keeps it inside for longer, so the boiler fires up less often and your rooms hold their warmth.
What Insulation Actually Does
Insulation does three things at once. First, it cuts your heating bills, because less heat escapes and your boiler runs less. Second, it makes rooms more comfortable, because floors feel warmer, cold spots near outside walls fade, and the temperature stays steady instead of rising and falling. Third, it cuts the carbon your home produces, because a home that needs less heat burns less gas or uses less electricity.
It also works in summer. A well-insulated home stays cooler in hot weather, because the same material that slows heat escaping in winter also slows heat getting in during a heatwave. That matters more each year as UK summers get warmer.
U-Values in Plain English
You will see the term U-value on insulation products and surveys. It is a measure of how fast heat passes through a part of your home. A lower U-value means less heat escapes, which is what you want. The Federation of Master Builders suggests aiming for U-values of at least 0.16 for loft insulation, 0.30 for walls, and 0.25 for floors. You do not need to remember the numbers. What matters is the idea: thicker insulation and better materials give a lower U-value and a warmer home.
Your home also has an Energy Performance Certificate, or EPC, which rates it from A (best) to G (worst). The EPC lists the insulation measures your home is missing and estimates the saving from each one. If you do not know your rating, you can look it up free on gov.uk. It is the best starting point for planning insulation work, because it is based on your actual home.
Where Does the Heat Go in a UK Home?
Before you spend money, it helps to know where the heat is going. The Energy Saving Trust gives a rough picture for a typical uninsulated home: about a quarter of the heat escapes through the roof, about a third through the walls, and 10 to 20 percent through the floor. The rest goes through windows, doors and draughts. These are rough figures, and every home is different, but they tell you where to look first.
Heat Loss Through the Roof
Heat rises, so the roof is the first place it escapes. In a home with a bare loft, the ceiling is often the thinnest barrier between warm rooms and cold air. That is why loft insulation is usually the first job: it is cheap, quick, and it tackles the biggest single leak in many homes. Even a thin layer of old insulation makes a real difference, and topping it up to the full depth is one of the best value jobs in home improvement.
Heat Loss Through the Walls
Walls lose the most heat of any part of the home, because they have the largest area. A solid brick wall with no insulation lets heat pass straight through. A cavity wall with an empty gap is better, but the gap still lets a third of the heat in the house escape. Filling that gap, or adding insulation to the inside or outside of a solid wall, is the biggest single saving for many homes, and it is also the most expensive job, which is why grants matter so much for wall insulation.
Heat Loss Through Floors, Windows and Draughts
Floors lose less heat than roofs or walls, but cold floors make a room feel freezing even when the air temperature is fine. A draughty floor, with gaps between boards and cold air moving in the void below, can make a living room uncomfortable all winter. Windows lose heat too, but replacing them is expensive and should come after insulation, not before. Draughts are the sneakiest loss of all: small gaps around doors, windows, letterboxes and loft hatches add up to a surprising amount of cold air coming in and warm air going out, and fixing them costs very little.
How to Work Out What Insulation Your Home Needs
Every home is different, and the right plan depends on how your home was built. When you plan how to insulate your house, work through these checks before you spend money, because they decide which measures will work and which ones will not.
Check Your EPC
Start with your Energy Performance Certificate. It tells you your rating from A to G, and it lists the insulation measures recommended for your home, with an estimated saving for each one. If your home is rated D, E, F or G, it is also the document that grant schemes ask for, so it is worth having it to hand when you check eligibility. You can find it free on gov.uk by entering your postcode.
Find Out What Type of Walls You Have
Your walls decide the biggest job. Most homes built after the 1920s have cavity walls: two layers of brick with a gap of 50 to 100 mm between them. Homes built before the 1920s usually have solid walls with no gap. You can tell by looking at the brick pattern. If the bricks are all laid lengthways, with long faces showing, the wall is probably a cavity wall. If you can see the short ends of bricks mixed in with the long faces, the wall is probably solid. You can also measure the wall thickness at a door or window: a cavity wall is usually around 270 mm or more thick, while a solid brick wall is usually around 220 mm thick. If you are not sure, a surveyor can tell you in minutes.
Check Your Loft and Floors
Lift the loft hatch and look. If you can see bare joists with no insulation between them, the loft needs insulating. If there is a thin layer, measure it: less than 270 mm means it can be topped up. Check whether the loft has a water tank or pipes, because they need lagging too, and check that the eaves have air gaps for ventilation. For floors, lift a corner of carpet or look under the house if you have a cellar. Suspended timber floors have floorboards with a void below, while solid floors are concrete or flagstones with no void. Homes built from the 1950s onwards often have solid floors, and homes built after 2000 usually have insulation built in already.
If you are planning grant-funded work, or your home is old, damp or unusual, get a proper survey. A retrofit assessor will look at the whole house and produce a plan under PAS 2035, the standard for whole-house retrofit. That plan is what grant schemes and good installers work from, and it stops you spending money on the wrong measure first.
Loft Insulation: The Quickest Win
Loft insulation is the cheapest, quickest and least messy insulation job, and when you work out how to insulate your house, it is where most homes should start. A typical semi-detached home can have it fitted in a day, and the insulation lasts for 40 years or more. If you plan to turn the loft into a room, read our attic conversion cost guide first.
How Thick Should Loft Insulation Be
The UK government recommends a minimum loft insulation thickness of 270 mm. That is about 10 inches, or roughly the length of a school ruler. The first 100 mm does most of the work, but the full 270 mm is what the guidance asks for, and it is what grants and installers aim for. If your loft already has 120 mm, topping it up to 270 mm is still worth doing, although the extra saving is small: the Energy Saving Trust puts it at around £17 a year for a typical home. The big saving comes from insulating a bare loft, where there is nothing at all.
Cold Roof and Warm Roof
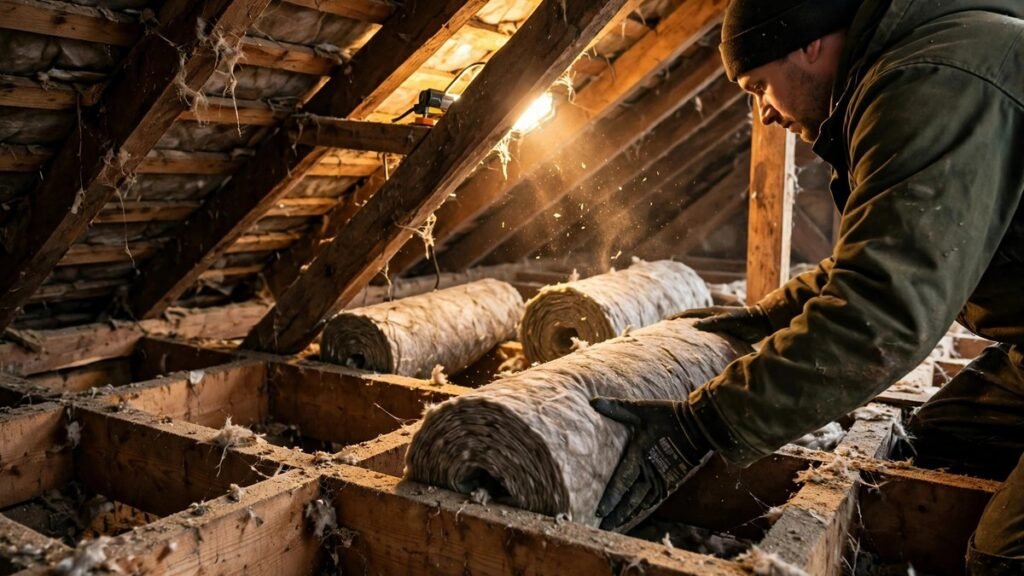
There are two ways to insulate a loft. The common one is called a cold roof: insulation is laid between and over the ceiling joists, so the loft itself stays cold and the rooms below stay warm. Mineral wool rolls are the usual material, laid in two layers, one between the joists and one across them. Loose-fill insulation, sheep wool and rigid boards are also used, and sheep wool suits period homes where the roof needs to breathe.
The other way is called a warm roof: insulation is fitted at rafter level, between or above the roof rafters, so the loft itself is warm. This is the right choice if you use the loft as a room, because it keeps the loft space warm as well as the rooms below. It costs more and needs a specialist, so for most homes the cold roof method is the one to choose.
Loft Insulation Costs and Savings
Professional installation of 270 mm of mineral wool in a typical semi-detached home costs around £300 to £750, and doing it yourself with materials from a builder’s merchant can cost as little as £200 to £300. The Energy Saving Trust estimates the saving at up to £590 a year for a detached house and around £150 to £300 a year for a semi, when the loft starts bare. That is the best case. Measured data from the Department for Energy Security and Net Zero, based on real gas meters, found a smaller median saving of 3.2 percent of gas use for loft insulation, which works out at around £27 a year for a typical semi. The truth sits between the two figures: a bare loft saves a lot, a topped-up loft saves a little, and homes that heat more after insulating save less on paper because they are warmer. Either way, loft insulation pays for itself in one to four years when the loft starts bare, and the comfort gain starts on day one.
There are a few rules to follow. Do not squash the insulation, because squashing it removes the air pockets that do the work. Do not cover downlights or electrical cables with it, because they need air to stay cool. Keep the eaves clear so air can flow through the loft, and do not block the loft hatch, because it needs a seal and insulation of its own. If you store things in the loft, lay raised boards on legs so the insulation keeps its full depth underneath. And lag any pipes and the water tank in the loft, because they are now sitting in a cold space.
Cavity Wall Insulation
If you are working out how to insulate your house and it was built after the 1920s, filling the empty cavity wall gap is usually the single biggest saving for your home. It is a professional-only job, it takes a few hours, and the result lasts for 25 years or more.
How Cavity Wall Insulation Is Fitted
The installer drills small holes of 22 to 25 mm in the outside walls, about one metre apart, and pumps insulating material into the cavity until it is full. The usual materials are mineral wool fibre, expanded polystyrene beads, or polyurethane foam. The holes are then filled and sealed with cement to match the wall. The whole job usually takes a few hours for a typical house, there is no mess inside the home, and you can stay in the house while it is done.
When Cavity Wall Insulation Is Not Suitable
Cavity wall insulation is not right for every home, and a good installer will say no when it does not suit. It may not be suitable if your home is exposed to driving rain, if the walls are in poor condition, if the cavity is too narrow at less than 50 mm, if the cavity is already partly filled or blocked, or if your home is prone to flooding or has existing damp. Filling a cavity in the wrong home can make damp worse, because the fill can carry rain across the gap to the inside wall. That is why the installer should survey the walls first and check the exposure, the wall condition and the cavity width before they drill a single hole.
Cavity Wall Insulation Costs and Savings
Costs vary a lot by house size. For a smaller semi-detached home, expect around £500 to £1,500. The Energy Saving Trust puts the figure at around £2,200 for a typical home in Great Britain, which covers larger homes. The saving also varies. The Energy Saving Trust estimates up to £395 a year for a semi-detached home. The measured data from the Department for Energy Security and Net Zero found a median saving of 12 percent of gas use, which works out at around £101 a year for a typical semi. As with loft insulation, the “up to” figure is the best case, and the measured figure is the typical case. The payback is usually 2 to 5 years on the best-case figures and much longer on the measured figures, which is why grants matter: with a grant covering the cost, the saving starts at once.
Make sure the work comes with a guarantee. Cavity wall insulation installed by a registered installer should come with a 25-year guarantee from the Cavity Insulation Guarantee Agency, known as CIGA. Ask for it in writing before the work starts, and keep the certificate with your house documents.
Solid Wall Insulation: Inside or Outside
Homes built before the 1920s usually have solid walls with no cavity to fill, so how to insulate your house comes down to two choices, inside or outside. Insulating them costs far more than cavity wall insulation, and it is the job where grants make the biggest difference. There are two ways to do it, and each suits a different home.
Internal Wall Insulation
Internal wall insulation means fixing insulating boards to the inside face of your outside walls, then covering them with plasterboard. It costs around £4,000 to £14,000 for a typical home, depending on size and finish. You can do it room by room, which spreads the cost, and it does not change how the house looks from outside. The trade-offs are real: you lose 100 mm or more of room space on each outside wall, and the work turns the room upside down, because sockets, radiators, skirting boards and fitted furniture have to come off the walls and go back on. It suits homes where the outside cannot be changed, such as listed buildings or homes in conservation areas.
External Wall Insulation
External wall insulation means fixing insulating boards to the outside face of your walls and covering them with render or cladding. It costs around £8,000 to £15,000 or more for a typical home. It does not take any room space, it improves the look of the house, and it wraps the whole home in one unbroken layer, which cuts cold spots. The trade-offs are the cost and the appearance: it changes how the house looks, it needs planning permission in some cases, and it is not suitable for listed buildings or homes in conservation areas without consent. It is the best choice when the outside render needs replacing anyway, because the scaffolding and the render work are already part of the job.
Which One Suits Your Home
The choice comes down to three questions. Can the outside of your home be changed? If not, internal insulation is the answer. Is the outside render in poor condition? If so, external insulation makes sense, because you are paying for scaffolding and render anyway. Can you live with the disruption? Internal insulation means living with building work inside your rooms, while external insulation keeps the mess outside. Either way, get a survey first. Solid wall insulation on a damp wall, or on a wall that has not been checked, can trap moisture and cause serious problems. The measured saving from solid wall insulation is around 17 percent of gas use, according to the Department for Energy Security and Net Zero, which works out at roughly £150 to £600 a year depending on house size and starting point. Without a grant, the payback is long, often 10 to 20 years or more. With a grant covering much of the cost, it is a different story, which is why the grants section of this guide matters so much for solid wall homes.
Floor Insulation
When people learn how to insulate your house, floor insulation is the measure most people forget, and it is the one that changes how a home feels underfoot. Cold floors make a room feel freezing even when the air temperature is fine, so insulating the floor can make a bigger difference to comfort than the saving on the bill suggests.
Suspended Timber Floors
Many Victorian and Edwardian homes have suspended timber floors: floorboards with an empty void below them. Insulation is fitted by lifting the floorboards and laying mineral wool or rigid foam boards between the floor joists. It costs around £800 to £2,500 depending on the size of the room and how easy the access is. If you have a cellar, the installer may be able to fit it from below without lifting the boards at all. The important rule is to keep the air bricks clear, because the void under the floor needs air moving through it to stop damp and rot in the joists. Never block an air brick to stop a draught. Seal the gaps in the floorboards instead, and leave the air bricks open.
Solid Concrete Floors
Homes built from the 1950s onwards often have solid concrete floors, and homes built after 2000 usually have insulation built in already. Insulating a solid floor means laying rigid insulation boards on top of the slab, then a new floor finish on top of them. It costs around £2,000 to £4,000 depending on the area. The catch is that it raises the floor level, so doors may need trimming, skirting boards may need moving, and the step at the front door changes. It causes a lot of mess, which is why it is usually done when the floor is being replaced anyway, or as part of a bigger renovation.
Floor insulation saves around £50 to £100 a year on bills for a typical home, which is less than loft or wall insulation. The payback is slow, often 5 to 15 years. The reason to do it is comfort: warm floors, fewer draughts from below, and rooms that feel warm at a lower thermostat setting. You only need to insulate ground floors, unless a room sits over an unheated space such as a garage or a basement, in which case that floor benefits too.
Draught-Proofing Doors and Windows
Draught-proofing is the cheapest step when you learn how to insulate your house, and it is the one to do first if your budget is tight. It means sealing the gaps that let cold air in and warm air out, without sealing the home so tightly that it cannot breathe.
Doors and Windows
The gaps around doors and windows are the biggest source of draughts. Self-adhesive foam strips, rubber seals and brush strips cost a few pounds and can be fitted in an afternoon with no special tools. A brush strip on the bottom of a front door stops the draught that blows across the hallway floor. Seals around window frames stop the cold air that whistles in on windy nights. If your windows are very old, secondary glazing or heavy curtains can help too, but draught-proofing strips are the cheap first step. Sash windows need special seals that still let them slide, and a joiner can fit those for you.
Chimneys and Letterboxes
An unused open chimney is one of the biggest draughts in a home. A chimney balloon, which is an inflatable bag that blocks the flue, costs around £20 to £30 and can be fitted in minutes. A chimney cap on the pot outside costs from around £150 and also keeps out rain and birds. The Energy Saving Trust puts the saving from draught-proofing an unused open chimney at around £45 a year in Great Britain. Letterboxes, keyholes and cat flaps are smaller draughts, but they add up: a letterbox brush, a keyhole cover and a draught-proof cat flap each cost a few pounds and take minutes to fit. The loft hatch is another common gap: fit a seal around it and a layer of insulation on top of the hatch itself.
How Much Draught-Proofing Saves
Professional draught-proofing for a whole house costs around £250, and doing it yourself costs far less. The Energy Saving Trust puts the saving from draught-proofing windows, floors and doors at around £55 a year in Great Britain, and other estimates put it at up to £100 to £125 a year. On those figures, professional draught-proofing pays for itself in about five years, and DIY draught-proofing pays for itself in under a year. There is also a knock-on saving: a draught-free home feels comfortable at a lower temperature, and turning your thermostat down by one degree, from 22 to 21 degrees, saves around £120 a year, according to the Energy Saving Trust.
Insulating Pipes and Your Hot Water Cylinder
When you plan how to insulate your house, pipes and hot water cylinders are small jobs with quick paybacks, and they are easy to miss when you are thinking about walls and roofs. They are worth doing in the same week as the loft insulation, because the materials are cheap and the work is simple.
Lagging Pipes in Cold Places
Pipes in cold places, such as the loft, the garage and under the floor, lose heat and can freeze in a cold snap. Foam pipe lagging, which is a tube of foam that slips over the pipe, costs a few pounds per metre and can be fitted in minutes with no tools. Lag the hot water pipes to stop heat escaping, and lag the cold water pipes in the loft to stop them freezing and bursting. A burst pipe in a loft can cause thousands of pounds of water damage, so this cheap job also protects your home. Pay special attention to pipes near the eaves and the loft hatch, where the cold air is worst.
Hot Water Cylinder Jackets
If you have a hot water cylinder, and many homes with system or heat-only boilers do, it needs a jacket. A British Standard jacket, 80 mm thick, costs around £25 and can save around £50 a year, according to the Energy Saving Trust. It fits in minutes: it wraps around the cylinder and fastens with straps. If your cylinder already has factory-fitted foam insulation, it does not need a jacket, but older cylinders with thin or no insulation benefit a lot. Also lag the first metre of hot water pipe leaving the top of the cylinder, because that is where the most heat escapes. A jacket and pipe lagging together cost less than £50 and can pay for themselves in under a year.
How Much Does It Cost, and How Much Does It Save?
Costs and savings are at the heart of how to insulate your house, and they vary by house size, starting point and region, so treat the figures below as typical UK ranges for a semi-detached home, not as quotes. The cost figures come from the Energy Saving Trust and UK installer guides. The saving figures show two views: the “up to” figure is the best case for a home that starts with no insulation at all, and the measured figure comes from the Department for Energy Security and Net Zero, based on real gas meters in England and Wales.
Cost and Savings at a Glance
| Measure | Typical cost | Saving a year (best case) | Saving a year (measured) |
|---|---|---|---|
| Loft insulation, bare to 270 mm | £300 to £750 | Up to £590 | Around £27 |
| Loft insulation, top-up 120 to 270 mm | £150 to £600 | Up to £135 | Around £17 |
| Cavity wall insulation | £500 to £2,200 | Up to £395 | Around £101 |
| Solid wall insulation, internal | £4,000 to £14,000 | £250 to £400 | Around £150 |
| Solid wall insulation, external | £8,000 to £15,000 | £300 to £600 | Around £151 |
| Floor insulation, suspended timber | £800 to £2,500 | £50 to £100 | Not published |
| Draught-proofing, professional | Around £250 | Up to £125 | Around £55 |
| Hot water cylinder jacket | Around £25 | Around £50 | Not published |
The gap between the best-case and measured figures is the most honest thing in this guide, so it is worth explaining. The best-case figures assume a home with no insulation at all, heated all day, with the occupants keeping the same habits after the work. The measured figures come from real homes, where some households heat their better-insulated home to a higher temperature, which uses some of the saving as extra comfort. That is not a failure: a warmer home is part of what you are paying for. But it means you should not plan your budget on the biggest saving figure you see in an advert. Plan on the measured figure, and treat anything above it as a bonus.
For a typical three-bedroom semi-detached home, the common measures together, loft insulation, cavity wall insulation and draught-proofing, usually cost £2,000 to £4,000 in total. Industry guides suggest the three together can cut heating bills by £450 to £800 a year, but on the measured figures the combined saving is closer to £180 a year. The comfort gain is real either way: warmer rooms, fewer cold spots, and a boiler that runs less often.
Which Order Should You Insulate In?
The order matters when you plan how to insulate your house, because the cheap wins pay for themselves fast and the big jobs need grants or a bigger budget. The rule is simple: start with the cheapest measures that save the most, and leave the expensive ones until last. Insulate first, and upgrade your heating second, because a new boiler or heat pump in a leaky home wastes much of its benefit.
The Cheap Wins First
Start with draught-proofing, because it costs the least and you can do it yourself in a weekend. Then insulate the loft, because it is the cheapest big job and it takes a day. Then fill the cavity walls, if your home has them, because it is the biggest single saving for most post-1920s homes. Then insulate the floor, if you have suspended timber floors and the access is easy. Each of these steps makes the next one work better, because the home is already warmer and less draughty.
The Big Jobs Last
Solid wall insulation comes last, because it costs the most and pays back the slowest. It is the job to do when a grant covers much of the cost, or when the outside render needs replacing anyway, or as part of a bigger renovation. Double or triple glazing also comes last, not first: new windows cost £3,000 to £7,000 for a typical home, and they save less than insulation for the money. Fix the roof, the walls and the draughts first, then think about windows. And if you are planning a heat pump, insulate first: a heat pump works best in a well-insulated home, and the government grant for heat pumps, the Boiler Upgrade Scheme, is worth more when the home holds its heat.
Grants and Schemes That Pay for Insulation in the UK
Insulation is one of the upgrades most likely to be fully funded by government schemes, and checking eligibility before you spend money is the single most useful step when you learn how to insulate your house with help from a grant. Schemes change often, so check the current rules on gov.uk or with your energy supplier before you commit to anything.
ECO4
ECO4, the Energy Company Obligation, runs until 31 December 2026. It requires the larger energy suppliers to fund home energy improvements for lower-income and vulnerable households. It can cover loft insulation, cavity wall insulation, solid wall insulation and heating upgrades, and for eligible households the funding can cover the full cost. You usually qualify if you receive certain means-tested benefits, or if your home has an EPC rating of D, E, F or G and your household income is low. Your energy supplier or your local council can tell you if you qualify, and the work must be done by a TrustMark-registered installer.
Warm Homes Plan
The Warm Homes Plan is the government’s main scheme for England, and it includes the Warm Homes: Local Grant, which your council can use to pay for wall, loft and underfloor insulation. It is aimed at privately owned homes rated D, E, F or G, where the household income is usually £36,000 or less, or where someone in the home receives certain benefits. Your landlord may need to contribute if you rent privately. The scheme can fund up to £30,000 of upgrades for qualifying households in some cases, covering insulation and heating together. Ask your local council what funding it has, because the money is handed out locally and the rules vary by area.
Scotland, Wales and Northern Ireland
Scotland has its own scheme through Home Energy Scotland. Homeowners can get grants of up to £1,500 for loft, cavity or underfloor insulation, and up to £7,500 for solid wall insulation, up to 75 percent of the combined cost and £7,500 in total, plus an optional interest-free loan. Rural and island homes get £1,500 more. Wales has Nest, which can fund insulation for eligible households, and Green Homes Wales, which lends £1,000 to £25,000 interest-free to homeowners without a means test. Northern Ireland has NISEP, which fully funds insulation for household incomes under £33,000 for a single person or £40,000 for a couple, and Affordable Warmth, which gives up to £7,500 to owner-occupiers and private tenants with incomes under £23,000.
0% VAT on Energy-Saving Materials
Installing insulation, heat pumps and solar panels in your home currently comes with 0 percent VAT, and that relief is due to end on 31 March 2027. It applies to the materials and the installation when they are supplied together by the installer. It is a smaller saving than a grant, but on a £10,000 solid wall job it saves £2,000, which is worth knowing about before you get quotes.
One warning: the Great British Insulation Scheme closed on 31 March 2026. If a company offers you work under that scheme now, it is out of date, and you should check what they are really offering. The live schemes are ECO4, the Warm Homes Plan, and the devolved schemes in Scotland, Wales and Northern Ireland.
DIY or Professional: What You Can Do Yourself
Some insulation jobs are easy DIY, and some must be done by a professional. When you work out how to insulate your house, knowing which is which saves money and stops problems.
Jobs You Can Do Yourself
Loft insulation is the classic DIY job. Laying mineral wool rolls between and across the joists is straightforward, and the materials cost £200 to £300 for a typical loft. Wear a mask, gloves and goggles, because mineral wool irritates skin and lungs, and work on boards laid across the joists so you do not put a foot through the ceiling. Draught-proofing is also DIY: foam strips, brush strips, letterbox brushes and keyhole covers all fit with basic tools. Pipe lagging and a cylinder jacket are DIY too, and they take under an hour. If you are confident on a ladder and comfortable in a loft, these three jobs can save you hundreds of pounds in labour.
Jobs That Need a Professional
Cavity wall insulation must always be done by a professional, because it needs specialist equipment and a survey first, and a bad fill can cause damp. Solid wall insulation needs a professional too, because the boards must be fitted without gaps, the details around windows and doors matter, and the work may need building control sign-off. Floor insulation is usually a professional job, because lifting floorboards and working in the void below causes a lot of mess and needs care around pipes and cables. Spray foam insulation should only be fitted by a trained installer, because the chemicals need correct mixing and ventilation, and a bad spray foam job is very hard to remove.
When you hire an installer, look for TrustMark registration, which is required for grant-funded work, and membership of the National Insulation Association. For cavity wall work, ask for the CIGA 25-year guarantee in writing. For grant work, the installer must be PAS 2030 certified. Get at least three written quotes, check references and photos of past work, and never pay the full amount up front. A quote that is far cheaper than the others is a warning sign, not a bargain.
Ventilation, Damp and Condensation: The Risks to Avoid
Insulation makes a home more airtight, and that is the point. But a home still needs fresh air, and sealing it up without thinking about ventilation is the most common cause of damp after insulation work. This section matters as much as any other when you learn how to insulate your house.
Why a Sealed Home Still Needs Air
Every home produces moisture: cooking, showering, washing, drying clothes indoors, and even breathing all add water vapour to the air. In a draughty home, that moisture escapes through the gaps. In a well-insulated home, it stays inside unless you let it out. If it stays, it condenses on cold surfaces such as windows and outside walls, and that leads to mould, peeling paint and damage to plaster and timber. The answer is not to leave the home draughty. The answer is controlled ventilation: air coming in and going out where you choose, not through random gaps.
Signs of Damp and Condensation
Watch for condensation on windows in the morning, black mould in corners and behind furniture, a musty smell, peeling paint, and damp patches on walls. These signs mean the home has too much moisture and not enough ventilation, and they need fixing before you add more insulation. Never insulate over a damp wall. Fix the cause of the damp first, whether it is a leaking gutter, a broken damp-proof course, a blocked drain or condensation, and let the wall dry out before the insulation goes on.
How to Ventilate After Insulating
Keep trickle vents on windows open, and do not seal them shut. Use extractor fans in the kitchen and bathroom, and let them run for 20 minutes after cooking or showering. Do not block air bricks, because they ventilate the void under suspended floors and stop rot in the joists. Keep a 50 mm gap at the eaves in the loft so air can flow above the insulation. Open windows for a short time each day, even in winter, to change the air. In a home that has had a lot of insulation work, a mechanical ventilation system with heat recovery, which brings in fresh air and warms it with the outgoing stale air, can be worth considering, although it is a bigger job and a bigger cost.
A bathroom extractor fan is the simplest way to move moist air out after you insulate. Pick a fan with a humidistat so it switches on when steam builds up, and keep trickle vents open so fresh air can come in. Never block air bricks or loft eaves vents, because trapped moisture leads to mould.
Mistakes to Avoid When You Insulate Your House
Most insulation problems are avoidable. Here are the mistakes that cause the most trouble when you learn how to insulate your house.
Skipping the survey is the first mistake. A home with damp, an exposed position or a narrow cavity needs a different plan from a standard home, and the survey is what finds that out. Blocking ventilation is the second: sealing trickle vents and air bricks to stop draughts traps moisture and causes mould. Insulating over damp is the third: the insulation hides the damp instead of fixing it, and the wall gets worse behind the boards. Squashing loft insulation is the fourth: squashing it removes the air pockets that do the work, so a squashed 270 mm layer performs like a much thinner one. Leaving gaps is the fifth: insulation works as a layer, and a gap is a hole in that layer, so take time to cut boards to fit and seal the joints. Forgetting the pipes is the sixth: pipes in a newly cold loft can freeze and burst, so lag them in the same visit. Choosing on price alone is the seventh: the cheapest quote often means the thinnest material, the least care, or no guarantee. And expecting instant payback on big jobs is the eighth: solid wall insulation pays back over decades without a grant, so judge it on comfort and grants as well as on the bill.
Quick Takeaways
- Insulate in this order: draught-proofing, loft, cavity walls, floor, solid walls last.
- Loft insulation to 270 mm is the cheapest big win, and it lasts 40 years or more.
- Cavity wall insulation suits most homes built after the 1920s, and it comes with a 25-year CIGA guarantee.
- Check grants first: ECO4 ends on 31 December 2026, and the Warm Homes Plan can fund whole-house upgrades.
- Never insulate over damp, and never block ventilation, trickle vents or air bricks.
- A hot water cylinder jacket costs around £25 and can pay for itself in under a year.
- Plan on the measured savings, not the biggest “up to” figure in an advert.
- Insulate before you upgrade your heating: a heat pump or new boiler works best in a home that holds its heat.
Frequently Asked Questions
How much does it cost to insulate a house in the UK?
It depends on the measures. Loft insulation costs around £300 to £750, cavity wall insulation around £500 to £2,200, floor insulation around £800 to £2,500, and solid wall insulation around £4,000 to £15,000. Draught-proofing costs around £250 professionally, or far less as DIY. For a typical semi-detached home, the common measures together, loft, cavity wall and draught-proofing, usually cost £2,000 to £4,000 in total. Grants such as ECO4 and the Warm Homes Plan can cover the full cost for eligible households.
What is the best insulation for a house?
There is no single best insulation, because the right material depends on the part of the house. Mineral wool is the usual choice for lofts, because it is cheap and easy to lay. Expanded polystyrene beads or mineral wool fibre are the usual choices for cavity walls. Rigid PIR boards suit floors and internal solid walls, because they give good insulation in a thin layer. Sheep wool and wood fibre suit period homes where the walls need to breathe. The best insulation for your house is the one that suits your house type, your budget and your ventilation, and a survey will tell you which that is.
Is it worth insulating an old house?
Yes, and old houses gain the most, because they usually start with no insulation at all. A Victorian or Edwardian home with solid walls, a bare loft and draughty floors can save hundreds of pounds a year from insulation, and the comfort gain is large. The work needs more care than in a modern home: check for damp first, use breathable materials where the walls need them, keep ventilation open, and get a survey before you start. Solid wall insulation is expensive, so check grants first, but loft insulation and draught-proofing are cheap wins in almost every old house.
Can I get free insulation in the UK?
Yes, if you qualify. ECO4, which runs until 31 December 2026, can fully fund loft, cavity wall and solid wall insulation for households on certain benefits or with low incomes in homes rated EPC D to G. The Warm Homes Plan, through your local council, can fund insulation for privately owned homes rated D to G with household incomes usually £36,000 or less. Scotland, Wales and Northern Ireland have their own schemes. Check gov.uk, your energy supplier or your local council to see if you qualify, and make sure the installer is TrustMark registered.
Can insulation cause damp?
Insulation itself does not cause damp, but insulating a home without thinking about ventilation can. When a home becomes more airtight, moisture from cooking, showering and drying clothes has nowhere to go, so it condenses on cold surfaces and causes mould. The fix is controlled ventilation: keep trickle vents open, use extractor fans, do not block air bricks, and keep a gap at the eaves in the loft. Never insulate over an already damp wall, because the insulation hides the damp and the wall gets worse. Fix the damp first, then insulate.
Conclusion
Learning how to insulate your house is the most useful upgrade most UK homes can make, and it is the one to do before anything else. The numbers are clear: a bare loft can be insulated for a few hundred pounds, cavity walls for a few thousand, and draught-proofing for less than a weekend’s shopping. The savings are real, even if the measured figures are smaller than the best-case claims in adverts, and the comfort gain starts the day the work is done. A home that holds its heat is warmer, quieter and cheaper to run.
The plan is simple. Check your EPC and work out what type of walls, loft and floors you have. Start with draught-proofing and the loft, because they are cheap and quick. Fill the cavity walls if your home has them. Insulate the floor when you can. Leave solid walls until a grant covers much of the cost, or until the outside needs work anyway. Check ECO4 and the Warm Homes Plan before you spend money, because the funding can change the whole calculation. And take ventilation seriously: keep the vents open, fix damp first, and never block the air bricks.
Do that, and your home will be warm in winter, cool in summer, and cheaper to run. The insulation will still be working long after the boiler is replaced, which is why it is the first upgrade to make and the last one you will regret.